Documentation
- Main Window
- Working with Documents
- Importing images from scanners and cameras
- Guides and Grids
- Plugins
- Pen Tablet Support
- Customize Keyboard Shortcuts
- Customize Performance
- Manage Languages
- Palettes
- Custom Palettes
Preset Manager
You can use the Preset Manager to manage all Artweaver materials. Following materials can be managed: Brushes, Paper Textures, Imagestamps, Captured Brushes, Gradients, and Color Sets. You can name, delete, rearrange, import, and export materials.
For brushes, you can additional move brush variants into several brush categories. And you can also create new brush categories and rearrange them.
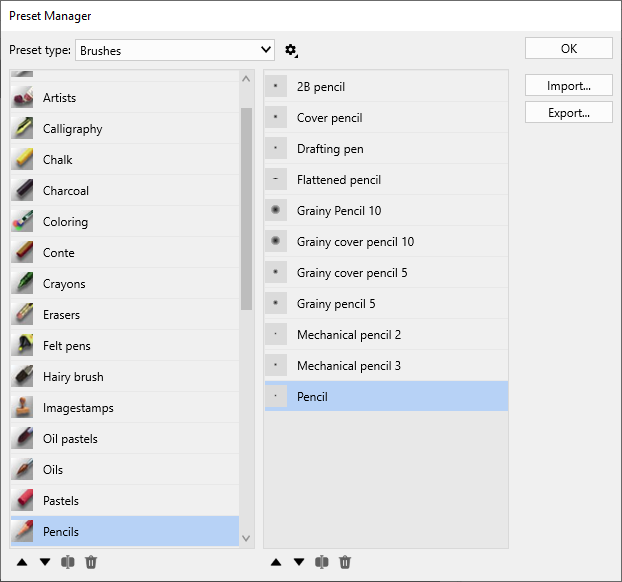
The Preset Manager.
To name materials
- Choose Main Window menu -> Edit -> Presets -> Preset Manager to display the Preset Manager
- Choose a material from the Preset box
- Select a material and click the Rename button

- Type a new name for the material and click OK
To delete materials
- Choose Main Window menu -> Edit -> Presets -> Preset Manager to display the Preset Manager
- Choose a material from the Preset box
- Select a material and click the Delete button

To rearrange materials
- Choose Main Window menu -> Edit -> Presets -> Preset Manager to display the Preset Manager
- Choose a material from the Preset box
- Select a material
- Click the arrow buttons to move the material one up or one down
 This feature is only available in Plus version.
To import materials
- Choose Main Window menu -> Edit -> Presets -> Preset Manager to display the Preset Manager
- Choose a material from the Preset box
- Click the Import button
- Choose the file you want to import, and click on OK
To export materials
- Choose Main Window menu -> Edit -> Presets -> Preset Manager to display the Preset Manager
- Choose a material from the Preset box
- Select a material and click the Export button
- Enter a name for the material in the Filename box, and click OK
 It is not possible to use the export command in any material category. In such categories the Export button is disabled.
To move brush variants
- Choose Main Window menu -> Edit -> Presets -> Preset Manager to display the Preset Manager
- Choose Brushes from the Preset box
- Select a brush variant
- Click the preset menu arrow
 , and choose Move Variant
 - Choose a brush category in the Destination box and click OK
To move a brush variants into a new brush category
- Choose Main Window menu -> Edit -> Presets -> Preset Manager to display the Preset Manager
- Choose Brushes from the Preset box
- Select a brush variant
- Click the preset menu arrow , and choose Move Variant
- Choose Create new Category in the Destination box and enter a name for the new category in the New Category box
- Click OK to create the new category
You can only create new brush categories by moving existing brush variants. Creating a brush category without brush variants is not possible.