Guides and Grids
The document window features guides and grid that help you position and size images and image elements.
Guides
Guides are non printing lines that appear over the image in the document window. They are very helpful in aligning image elements. You can place guides at any position in the document window and easily reposition and remove them. Guides can also be locked so that they can't be dragged.
To display or hide guides
- Choose Main Window menu -> View -> Show Guides or Hide Guides
To create a guide
- Show the guides
- Choose Main Window menu -> View -> New Guide
- Specify in the New Guide dialog box the Orientation and Position for the new guide
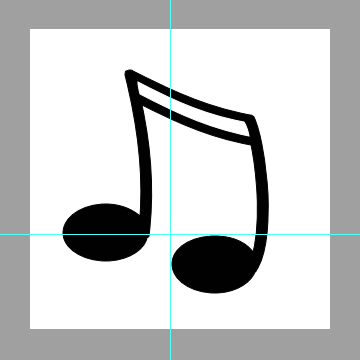
The document tab shows a horizontal and vertical guide.
To reposition a guide
- In the Tools palette, click the Move tool

- Drag the guide to any point in the document
To remove all guides
- Choose Main Window menu -> View -> Clear Guides
The Grid
Artweaver provides a grid to help you in laying down brush strokes or creating shapes. You can set the size and color of the grid.
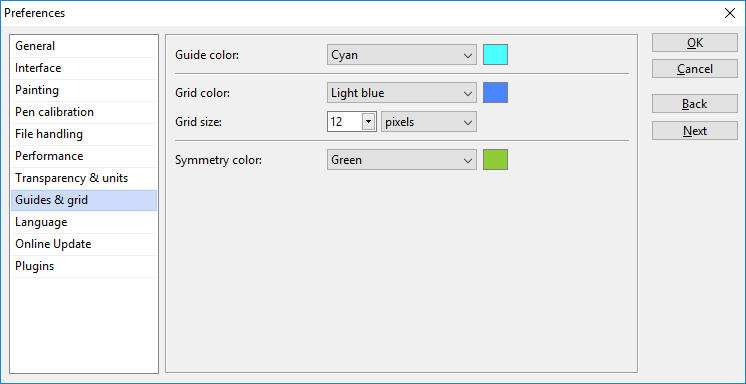
Preferences Guides & grid.
To display or hide the grid
- Choose Main Window menu -> View -> Show Grid or Hide Grid
To set grid options
- Choose Main Window menu -> Edit -> Preferences
- Choose in the Preferences dialog box Guides & grid
- Click the Grid color field to set the color of the grid lines
- Enter a value for the Grid size
The Perspective Grid
A perspective grid helps you to create three-dimensional images. Perspective grid is a non printing array of lines that converge at a single vanishing point. You can set the type, line color, and spacing of the perspective grid. You can also modify the location of the vertical plane and horizon line by using the Perspective Grid tool. Any perspective grid that you create or modify can also be opened for use in another drawing.
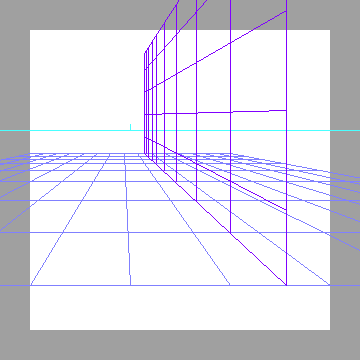
Use perspective grid lines to help you create 3D images.
To display or hide the default perspective grid
- With an image open, click the following form the Main Window menu: View -> Show Perspective Grid or Hide Perspective Grid
To create a new perspective grid
- In the Tools palette, click the Perspective Grid tool

- On the property bar, enable the check boxes corresponding the grids you want to see
- Choose a color for the horizontal and vertical grid lines in the Horizontal Grid Color box and Vertical Grid Color box
- Enter a value in the Spacing box
- On the property bar, click the Save Grid button
- In the Save Grid dialog box, enter a name in the Name box
To open a perspective grid
- In the Tools palette, click the Perspective Grid tool
- On the property bar, choose a grid from the Presets box
To remove a grid preset
- In the Tools palette, click the Perspective Grid tool
- On the property bar, choose a grid from the Presets box
- Click on the Delete Grid button
To adjust the perspective grid lines
- Choose Main Window menu -> View -> Show Perspective Grid
- In the Tools palette, click the Perspective Grid tool
- To move the horizontal plane grid, hold the cursor over the nearest edge of the horizontal grid. The cursor becomes a double-pointed arrow
- Drag to move the horizontal plane grid up or down
- To move the vertical plane grid, hold the cursor over the nearest edge of the vertical grid. The cursor becomes a double-pointed arrow
- Drag to move the vertical plane grid left or right