Painting
Artweaver lets you draw and paint as you might with real artists tools and media. Thereby an infinite variety of marks are possible.
The Brush tool offers users a wide range of preset painting and drawing tools called brush variants. Brush variants are organized into categories, such as Airbrushes, Calligraphy and Pencils. They are designed with real media in mind, so you can select a tool with an expectation of how it will behave. The Brush selector lets you choose a category and brush variant quickly and easily.
You can use the brush variants as they are, or you can adjust them to suit your purposes. If you want to make more extensive modifications to a brush or create a totally new brush variant, you can do just that by using the Brush editor.
Most brushes apply color to an image. Some brushes, however, do not apply color. Instead, they make changes to color already in the image. For example, the Smear brush variant (in the Smear brush category) smudges existing colors in the image with smooth strokes. Using one of these brushes on a blank area of the canvas has no effect.
Selecting a Brush
On the Brush selector, you can choose from brush variants that are arranged in recognizable categories. Those brushes are built to emulate Natural-Media tools, which lets you select a tool with a reasonable expectation of how it will behave.
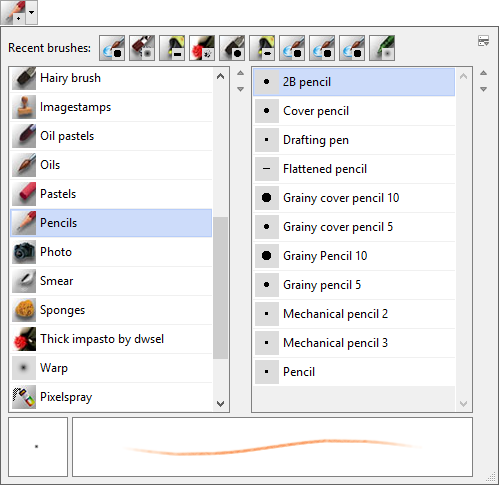
Brush selector.
To choose a brush
- In the Tools palette, click the Brush tool

- Click the arrow next the brush preview
 . The Brush selector is expanded
 - Choose a brush category and variant from the Brush selector
Choosing Brush Settings
Basic brush controls for size, opacity, and grain are located on the property bar. The property bar may also contain additional controls for the selected brush category, such as resaturation and bleed.
When a brush is selected and positioned over the canvas, the cursor changes, by default, into a ghost of the brush (mirroring size and shape) so you can see the area that you're about to paint. This ghost brush provides a handy way to see if a change in size is required.
The Brush editor contains other controls, depending on the selected variant. The Brush editor offers more sophisticated controls for resizing and shaping brushes, including a Minimum Size setting. When a brush takes advantage of the Minimum Size setting, you'll see strokes taper and widen as pen pressure or direction is varied.
To set brush size
- In the Tools palette, click the Brush tool
- Choose a brush from the Brush selector
- On the property bar, type a value in the Size box, or adjust the slider
To use the resize shortcut
- Hold down
 on the keyboard
 - With the Brush tool , drag in the image window
- A circle representing the brush size is displayed beside the pointer. When the circle is the size you want, release the mouse button
Adjusting Opacity and Grain
The Opacity slider controls the degree to which a stroke covers or builds up on the underlying pixels.

100 % opacity (top) and 30 % opacity (bottom).
The Grain slider controls how much color penetrates into the paper texture. Lower settings show less of the paper texture.
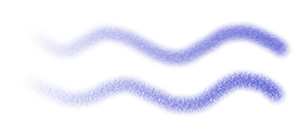
30 % grain (top) and 100 % grain (bottom).
To set opacity
- In the Tools palette, click the Brush tool
- Choose a brush from the Brush selector
- On the property bar, type a percentage in the Opacity box, or adjust the slider
|
|
When Opacity setting is low, the applied color is thin, allowing you to see through to the underlying colors. When the setting is high, the applied color covers underlying pixels more completely. |

To set grain
- On the property bar, type a percentage in the Grain box, or adjust the slider
- Move the slider to the right to reduce penetration and reveal more paper texture. Move it to the left to increase penetration and reveal less paper texture
|
|
For Imagestamp brushes, Grain controls the mixture with the background color. For other brushes, such as airbrushes, the Grain slider is not available. |